Twin Buttes Mapping Project:
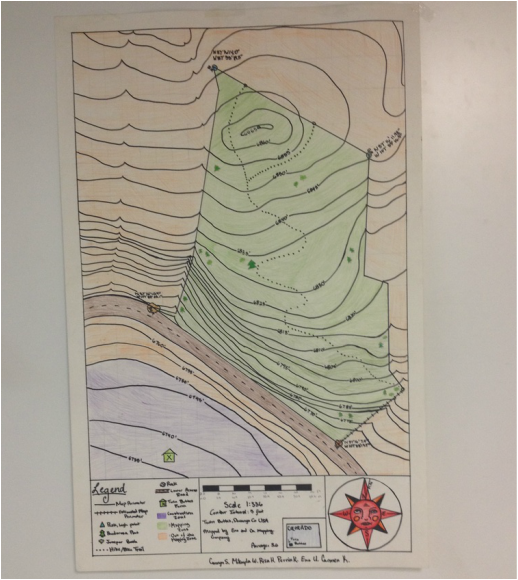
Methodology Behind The Map:
Before we could start drawing our maps we had to get bearings and count our paces to create a mental perimeter of the area. We would do this by measuring the compass bearing from one point of the area to another, and then we would walk to the next point while counting our paces. This way we calculated the length and direction of each side of the area, starting from Orange Rock. Our scale factor for the whole map was two millimeters per pace. Therefore the length of each segment was converted into centimeters.The main element of topographical maps are contour lines that indicate elevation changes in the landscape. They are helpful when going hiking, skiing, or backpacking because they show you where the slope of an area may be too steep to go or where the slope will be easy to walk on. When finding the contour lines for our map we used a virtual map on google. We placed four corner points relative to the rocks that we used in our map and filled in the area between with a different color. We could raise or lower the area by five meters which gave us an idea of what the slope was like. When creating our map we needed to be spatially aware as to where the roads, rocks, ravines, and plant life. We used the bearings and paces we took relative to each other to create our enclosed mapping zone.
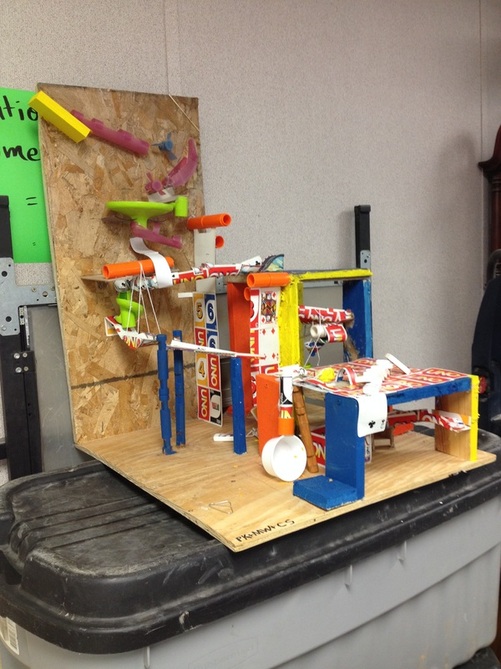
Rube Goldberg:
For this project, we had to create a Rube Goldberg that had to have a minimum of 15 steps and last a minimum of 15 seconds. At the end of the rube, it had to complete a task, ours was to make a taco. Our rube was successful and it had at least 20 steps and it lasted 17 seconds. Before the exhibition we had to do a reliability check and test our rube three times. It failed the check but that following weekend we worked on it and it ended up working better than most of the rubes at the exhibition. For 8 different spots on the rube, we had to do calculations such as transfer of energy, momentum, velocity, etc.
The Task: Make a Taco
Equations:
Calculation 1:
Velocity from video for first ball bearing going down pink ramp.
Velocity= m/s
Length of ramp= 16 cm
Time= 0.32s
Velocity= 0.16m/0.32s
Velocity= 0.5m/s
Calculation 2:
Conservation of momentum, transfer of energy from the first ball bearing to the glass marble.
Conservation of Momentum= m1v1=m2v2
Mass of first marble(m1)= 0.1635 kg
Mass of second marble(m2)= 0.00599kg
Velocity of first mable(v1)= 0.5m/s
Conservation of moment= (0.1635kg)(0.5m/s)=(0.00599kg)(v2)
Conservation of Momentum(v2)= 13m/s
Calculation 3:
Potential energy of the second silver marble in the first pulley.
Potential Energy= m•g•h
Mass of marble= 0.00189 kg
Gravity= 9.8 m/s2
Height= 0.07m
Potential Energy= (0.00189 kg)(9.8 m/s2)(0.07 m)
Potential energy= 0.001 J
Calculation 4:
Impulse of the domino connected to a card hitting the blue marble.
Impulse=F∆t=Pf-Pi
Change in time(∆t)=0.05s
Final momentum= (0.0059kg)(0.375m/s)
Initial momentum= 0 kg*m/s
Force in Newtons= 0.0022(Pf)-0(Pi)/0.05s(∆t)
Force in Newtons= 0.044 N
Calculation 5:
Power of the swing.
Power= w/t
Work(w)= 0.036 J
Time(t)= 0.16s
Power= 0.036 J/0.16s
Power= 0.23 W
Calculation 6:
Momentum of the swing.
Momentum= m•v
Mass(m)= 0.00574 kg
Velocity= 1.7m/s
Momentum= (0.00574kg)(1.7m/s)
Momentum= 0.01kg•m/s
Calculation 7:
Kinetic energy of the truck.
Kinetic Energy= ½ mv2
Mass= 0.0094 kg
Velocity= 0.23
KE= ½ (0.0094 kg)(0.23 m/s)2
KE= 0.0024 J
Calculation 8:
Velocity of the truck going down the ramp.
Velocity= d/t
Distance= 0.2 m
Time= 0.88 s
Velocity= 0.2m/0.88s
Velocity= 0.23 m/s
Rocket Project:
|
|
|
|
Rocket Log:
|
Entry 1 - Day 6
September 25, 2013 Entry 2 - Day 7
September 26, 2013 Entry 3 - Day 8
September 27, 2013 Entry 4 - Day 9
October 1, 2013 Entry 5 - Day 10
October 2, 2013 Entry 6 - Day 11
October 8, 2013 Entry 7 - Day 12
October 9, 2013 Entry 8 - Day 13
October 10, 2013 Entry 9 - Day 14
October 11, 2013 |
Today we will sand down the glue that is attaches the parachute strings to the rocket. We are doing this so that the parachute comes out easier.
Launch day, the rocket went really high but the parachute didn't deploy.
Cut out a smaller parachute to attach to the bigger one to pull it out when the nose cone comes off.
Test Launch, everyone launched. Attached strings of the small parachute to the big parachute.
We put the nose cone string through the middle of the small parachute, taped it so it would stay put. Threw the rocket off the hill to see if the parachute would deploy. It did.
We attached the plastic wings to the side of the rocket that will pop off the nose cone upon coming down.
Weighed the rocket, 2.38 N
Measured the rocket, 72 cm Last test launch! Added a ring of card stock to the nose cone to keep it on during the launch and its travel up. Fixed nose cone rip.
Loosened the nose cone ring to allow
|
Data Table:
Reflection:
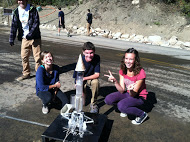
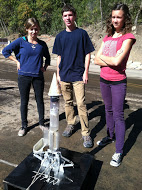
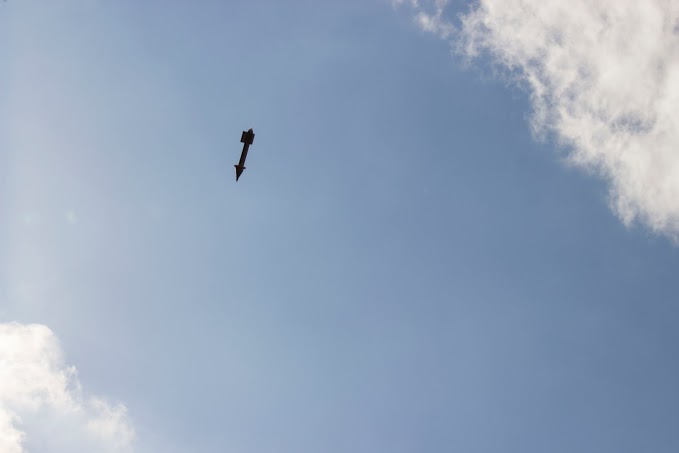
During the rocket exhibition, there were many successful rockets and other rockets that were not as successful. Although, I am not completely sure what category my group’s rocket would fall under. When our rocket was on the launch pad, we discovered that there was a leak in one of the seams that connected two bottles making the pressure chamber. Pressurized water was shooting out of the hole so the student that was pulling the launch trigger had to pull the trigger early so the rocket wouldn’t blow up. After it was launched, our rocket flew rather crookedly to the right and then plummeted back to earth. The parachute did not deploy for reasons that we are not completely sure of. While we were making the rocket, we had many problems with the parachute and had much trouble getting it to deploy, so I wasn’t completely surprised. Even though our rocket was not the highest flying rocket, we still feel that the launch was a success. The launch was a success because of all the the events that happened right before the exhibition.
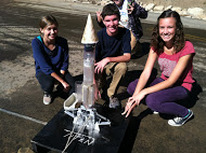
Many weeks of hard work and concentration are all put into making our rocket fly. We used a combination of Smart Water bottles, black plastic trash bags, wrappable packing foam, and various other water bottles. After constructing the rocket, we did a series of test launches. On the first test launch that we did, the parachute came out. In the test launches following though, we had great difficulty getting the parachute to deploy. We tried many different nose cone designs and parachute folding methods, yet we still had trouble. During one of the final test launches before the exhibition, our rocket launched and got stuck in a pine tree fifty feet up from the ground. There was no way that we were going to be able to get it down for the exhibition. Yet, Luke Stetler decided that he was going to climb fifty feet up in the tree and get the rocket. He didn’t tell us that he was going to do this so when he did, my other partner Mikayla Wright and myself were not very happy with him. After the rocket was back in our possession we did a few minor tweaks to the rocket to ensure that it was going to fly high and that the parachute was going to come out. We wanted to make sure that we would have a successful exhibition. After going through this entire process, I believe that my team and I had a successful exhibition.
Many weeks of hard work and concentration are all put into making our rocket fly. We used a combination of Smart Water bottles, black plastic trash bags, wrappable packing foam, and various other water bottles. After constructing the rocket, we did a series of test launches. On the first test launch that we did, the parachute came out. In the test launches following though, we had great difficulty getting the parachute to deploy. We tried many different nose cone designs and parachute folding methods, yet we still had trouble. During one of the final test launches before the exhibition, our rocket launched and got stuck in a pine tree fifty feet up from the ground. There was no way that we were going to be able to get it down for the exhibition. Yet, Luke Stetler decided that he was going to climb fifty feet up in the tree and get the rocket. He didn’t tell us that he was going to do this so when he did, my other partner Mikayla Wright and myself were not very happy with him. After the rocket was back in our possession we did a few minor tweaks to the rocket to ensure that it was going to fly high and that the parachute was going to come out. We wanted to make sure that we would have a successful exhibition. After going through this entire process, I believe that my team and I had a successful exhibition.
Conclusion:
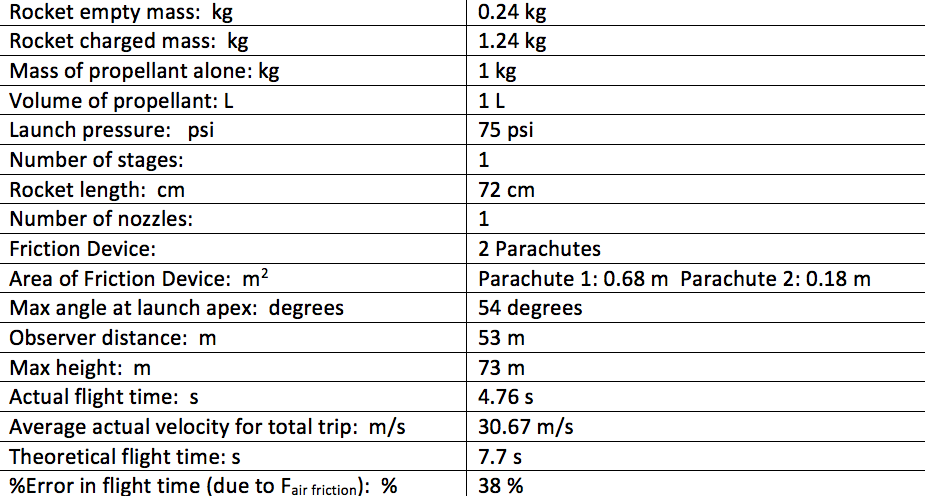
At the exhibition, our rocket flew at an angle fifty four degrees and had a maximum height of seventy three meters, the observation team was fifty three meters away. To calculate the maximum height, we multiplied the distance from the observation to the launch pad in meters by the tangent function of our rocket’s flight angle. In order to calculate the average velocity, I multiplied the rocket’s maximum height by two then divided it by the actual flight time ( 4.76 seconds). This gave us the average velocity of 30.67 meters per second. The theoretical flight time of our rocket was 7.7 seconds. We calculated this by dividing the maximum height by Earth’s acceleration (9.8 m/s) by 0.5. Then you find the square root of that number and multiply it by two. This gives you the theoretical flight time. Based on these two times, it’s easy to tell that they were both very different. After doing the calculations we figured out that there was a 38% error for what our flight time should have been. Our rocket’s flight didn’t go up and come straight down and our rocket didn’t have a working parachute which would have made the flight longer. Because of this, it was decided that these things were the cause of the error.
